Pages

Thursday, July 25, 2013

Kidney Shaped Vanity in French Linen

Late in the 1800s a young man immigrated from Germany to the United States.  He settled in Ohio where he and his wife raised 2 sweet girls.  He commissioned with a furniture craftsman to make a vanity for each daughter.  After being loved by four generations of young women, I had the pleasure of acquiring this tired vanity.  


I did not start to work on it for almost a year.  I read, studied, and practiced on other pieces before approaching this treasure.  My initial plan was to paint the entire piece in French Linen so I didn’t bother to strip the top.  I figured it was too far gone.  However, as you can see, that plan changed.  The beautiful wood was so worth saving. 


My version of French Linen is Coco mixed with Paris Gray.  I highlighted the moldings with a dry brush of Old White, and did a very subtle wash of Old White over the entire piece.  After the clear wax, I used some dark wax in strategic areas to add depth and character.


She has not yet been adopted into a new family.  It was an honor to have such a special piece come into our home.  So for now,  I will keep her safe in our foster care.

Thanks for stopping by.

Robin

Linking to:

LilyFieldLife

Miss Mustard Seed


Monday, July 15, 2013

Classic French Dresser

I love finding quality, stylish pieces.  In this case, it was a Dixie French style dresser. 


The dovetail drawers, wood on wood drawer guides and wood dust covers were all the ‘buy’ signals for me.


By now, I guess you know I try to save the tops of pieces.  So this dresser was no different.  After I stripped it, this is what I found: 


What do you think?  Is that some beautiful grain, or what?

I kept the base simple, Old White.  I am diligent with the Shellac, but have noticed after painting and beginning the waxing process, the wax seems to pull off some of the paint.  When I want thorough coverage, I am not a fan of a streaky paint job.  Hmmm…what to do?  I added a small amount of Old White to the clear wax and that helped immensely.   


Does anyone have any other suggestions for keeping the paint from pulling off while waxing?  If so, please, please share!

Anyway, after some light distressing, dark walnut stain, and several coats of poly acrylic, this lovely old dresser was complete.


I was so thrilled to be able to include some flowers from my yard in my pictures.  Azaleas along with tulips are so lovely to see at the end of a long, cold winter.  But now, we’re in a hot summer…and my hydrangeas couldn’t be happier!


Thanks for stopping by…

Robin

Linking to:

LilyFieldLife

BlueEggBrownNest


StoneGable

MissMustardseed

Update:  I heard from Suzanne at The Painted Drawer and Fiona from LilyField Life, both very talented ladies.  One suggestion was to make sure the paint was completely dry before applying the wax.  Another suggestion was to lightly sand between each coat of wax, and make sure to use a very thin coat of wax applied with a soft cloth.  So I tossed my wax brush aside, used MMS wax (I find this easier to apply than Annie Sloan wax), and used a soft cloth to apply the wax.  I've just finished a Dixie Hepplewhite dresser in Old White and there was NO STREAKING!  

Thank you ladies!


Monday, July 8, 2013

My First Empire Styled Chest

I have long admired the beautiful transformation so many talented folks have done with Empire styled chests.  At long last, I acquired one and had an immediate vision for its transformation.  


The veneer needed a bit of repair work.  A little wood filler and lots of sanding took care of that.


I wasn’t sure if the top was salvageable. 


When working on a piece, if at all possible, I usually opt to restore some of the natural wood.  In this case, the top looked good after I stripped it so I applied my favorite dark walnut stain. This was my first attempt at using dark wax as the protective coat.  It took me a few days to feel okay with the choice, but I really like how warm and natural it kept the look of the gorgeous grain of the wood.  


After the prep work, it took 2 coats of ASCP Graphite to cover the base and drawers and then a light distressing.  I was really looking for a warm black, so I skipped the clear wax and went straight to the dark wax.  The dark wax deepens the color value of the Graphite.  

After the obligatory buffing (oy vey, there must be an easier way!),  the chest was done. I was pleased with the final results.  


And as always, those legs......


This lovely chest now has found a new home with Melissa and Carl.  It was such a pleasure working with Melissa and watching her develop a her own sense of design.  

Thanks for stopping by!

Robin


Monday, July 1, 2013

A Tedious Makeover Done with Love

This post is dedicated to my dear daughter.  Your father and I couldn't be more proud...

A few months ago, my lovely daughter moved into a beautiful, but small apartment in NYC.  She was in need of a white chest for her bedroom.  Her color scheme is dark gray, white and pops of red for an accent.  When this chest appeared on CL, I responded right away.  I felt confident it was well made and as long as the width was right for the space, this was going to get an RPK makeover.  


When I spoke with the seller, I asked my usual questions:  Is the piece structurally sound?  Are the drawer guides wood on wood?  Do the drawers work well?  I got all of the right answers and headed over to the house to take a look and pick her up.  This was perfect timing! I had a few weeks to get this done before we headed up to NYC.  I was so excited!

When we arrived, I opened a drawer and this is what I saw:  


Oh my goodness!  Red spray paint on every square inch of the drawers!  I’m so excited about the shape, quality and size of the piece, I think “Aw, I can work with the red!”

My vision is a clean, Old White finish (no distressing) with clear knobs.  The original hardware  is a bit old fashioned for my daughter's taste, and a little sparkle would work well in her room.  I filled in the holes in the drawers and gave the chest a light sanding.


The more I looked at those drawers, I knew I had to ‘clean’ them up.  So I stripped them!  It took me a few days and a ton of elbow grease.  Sorry there are no pictures, but I wasn’t in the mental mind set to be snapping pictures.  I was in ‘determination’ mode. 

And heck, while I have the stripper out, let’s see what’s “under the hood” of the layers of paint on the top of the chest!  So I stripped and sanded the top!  (If anyone wants to send a therapist my way, it may be helpful!)  


After a week of prep, I finally started the painting.  I decided the top wasn't worth saving, so I painted it and the rest of the chest in Old White.  It took a few coats to get thorough coverage.  I waxed the body of 
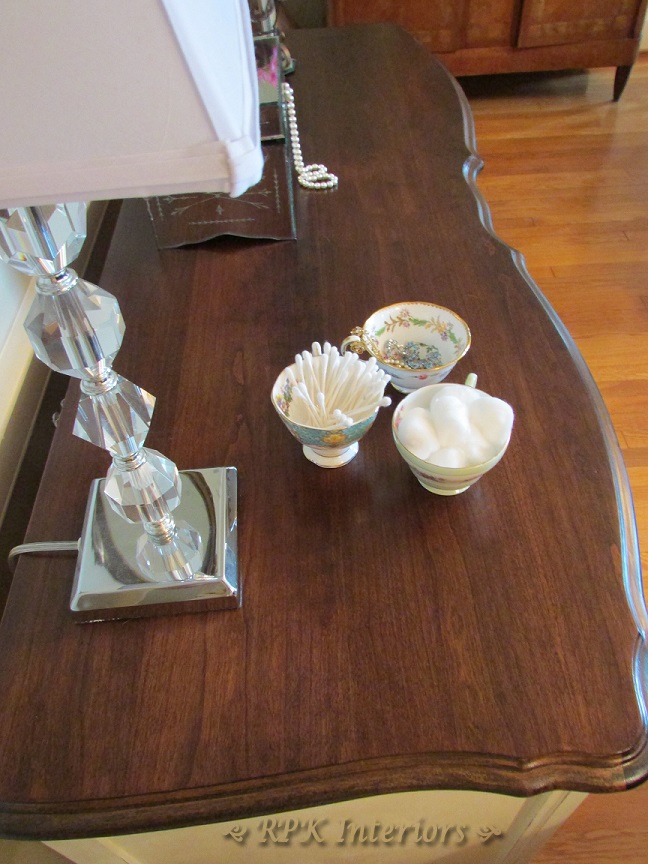
the chest, but put polyacrylic on the top since she uses it a lot for makeup and others girlie things!  I thought it would clean up easier for her.


I like to rub a little bar soap to the drawer guides to ensure the drawers move smoothly.  


And here she is, all finished!


And look at those drawers!


But in our family, we can be jokers.  She knew I had been working on the piece, but hadn't seen any pictures.  So I sent her the following note with a "before" picture of the tan chest with red drawers:

don't u just love it???  i love the tan and the red drawers!  it will pick up the red accents in your bedroom!  see you Friday!

After a few moments of freaking out and wondering if her mother had completely lost her mind, she realized I was just pulling her leg!

It was a cloudy day on our way up to NYC, but as we approached the Holland Tunnel, I had to snap a picture of the Freedom Tower (in between teary eyes).


I’m so proud of my daughter and so proud to be an American. 

Thanks for stopping by!

Robin