Making Sure Your Pieces are Safe to Bring into Your Home (or Someone Else's Home)
Over the weekend, there was a bit of chatter here locally about a disgruntled DIYer who purchased some "project pieces" only to find out later they were infested with bugs. It got me thinking about my process and how I have been fortunate enough to not have that happen to me....Was I just lucky or is there something in my process that helps to avoid such a disaster?
I thought sharing the steps I take before and during one of my reloves might help one or more of you avoid this kind of mess.
First off, I've brought pieces home from yard sales, thrift stores and Craigslist. If the piece strikes my fancy, I first consider the price. If it seems reasonable, then the drawers start coming out! Yep! Drawers are a big tell for me! Are they dovetailed, are the guides wood on wood, etc? Every drawer is removed to make sure everything is in good working order. If at that stage there is any infestation, you would know it!
Once I give it the A Okay, it gets loaded into our SUV and at that point I get a good look at the underneath of the piece. If those nasty pests aren't in the drawers, you may see them hiding underneath the case piece. I've had an occasional spider along with webs visible, but that's to be expected, especially if it's been stored in someone's garage.
Once it gets home, we take a picture of it in the driveway. At that point, I usually give it one more go over. At this step I'm starting to review it for possible options to relove it. How damaged is the top...can it be stripped and restained, for example.
And now for the process....The piece has been in my garage (which I must admit is not hermetically sealed!) for quite some time and now it's showtime! She gets 'moved on deck' as my hubby and I affectionately refer to it's starting block. The vision for the relove is set and usually involves stripping the top.
Down to the bare, pristine wood! If the wood is in good shape, the piece then gets flipped over and reinspected and prepped.
Sorry for the messy shot of my shop, but this is the real deal....so why try prettying it up? :) The two pieces in the previous picture were going to the same home with a custom layered process, so they needed to be done at the same time so the technique would be identical.
Each piece is inspected again, and thoroughly cleaned. Yes, even the underneath gets a good wiping down. Again, if there were anything ominous lurking on these pieces, I would know for sure by now.
In the above picture, do you happen to notice the blue painter's tape meticulously placed around the the top of this vanity? I'd be so embarrassed to have a finished piece loaded into someone's SUV to see sloppy paint lines underneath the lip of the piece. Clean lines....attention to detail. If you have a steady hand and can paint without painter's tape, then go for it. But I start rocking out to music, get lost in my thoughts and my paint brush can get a flyin'! :) The painter's tape keeps those lines clean and allows me to rock and roll!
Next are the drawers. If you've been following along with me for awhile, you know I have a serious obsession with clean drawers.
They are hard to see in this picture, but each drawer has been removed, along with the hardware. They are scrubbed, sometimes stripped (if there is too much nail polish or whatever else we discover!) and refinished. I personally don't paint drawers or line them. But each piece leaves here with pristine clean drawers.
The sides are taped off just as the top is, so there are always clean lines from the drawer fronts to the sides. These new owners want to know you have taken time and care for their forever piece.
At this stage, the painting process begins with the sanding, painting, sanding, painting. When it's time for the top coats and finishing touches, we bring the piece into my home. The cold winters here and hot, humid summers are not a good environment for applying top coats. At this stage, I am 100% confident I am bringing in a clean, safe piece.
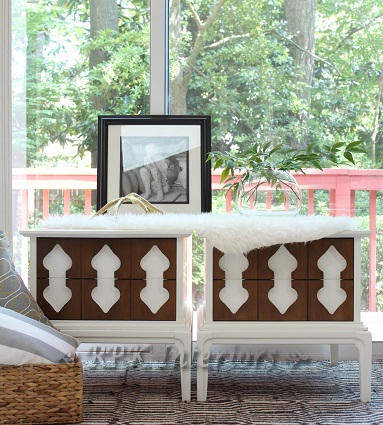
That's the tall chest you saw upside down in my garage....And here's the matching dresser....
I read a post from a very well respected blogger about a year ago. She does gorgeous work and when she was loading a vintage, depression era buffet into someone's truck, she discovered it was infested with termites. Her process never included turning the piece upside down, so she never noticed those nasty creatures. Don't let that happen to you...Please make sure each piece gets several thorough inspections along the way so you have confidence in knowing your masterpiece is safe to go to it's new, and hopefully, forever home!
Thanks for stopping by!
Robin