Pages

Tuesday, February 24, 2015

Learning to Reupholster - Thank You, Rachel!

A few years ago I snapped up this French accent chair from a thrift store.


I loved the gorgeous detail on the back and legs and thought I could make it prettier....one of these days.  But it sat, and sat, and sat.  

And then came along the lovely and talented Rachel from Shades of Blue.  She wrote the most wonderful tutorial on reupholstering French chairs.  You can read all about it here:

 I eventually spent an afternoon watching football with my hubby, removing staples and welting.  One of the better tips Rachel gave in her tutorial was to keep the original fabric in tact and use it as a template.  That tip ended up saving this project!

Two years later and with so much snow on the ground, I was desperate for a small, indoor project.  The poor, stripped chair got a coat of Old Ochre with highlights in Old White.  It just wasn't speaking to me, so I added a custom wash of French Linen and Graphite.


I love, love, love the finish! A little clear wax, dark wax, and some Old White dry brushing was bringing my two year vision to life.  Now for the reupholstering.

As I mentioned, Rachel provided so a smart tip by encouraging any DIYer to keep the original fabric to use a template.  Here is a picture of the new fabric cut slightly larger than the original piece.


I was afraid to cut it too close, but didn't want to have too much excess, either.  It's about 1/2 inch larger than the original piece.  Now it's time for my trusty nail gun:


I've had this guy for over 20 years!  In my previous life, I had a soft furnishings business for a few years and used it to staple valences to cornice boards!  He's been a trusty friend throughout the years!  Nothing fancy, but he gets the job done!  :)


That's the only decent picture I got before adding the trim.  You can see how creating the pleats above the legs is like wrapping a package....

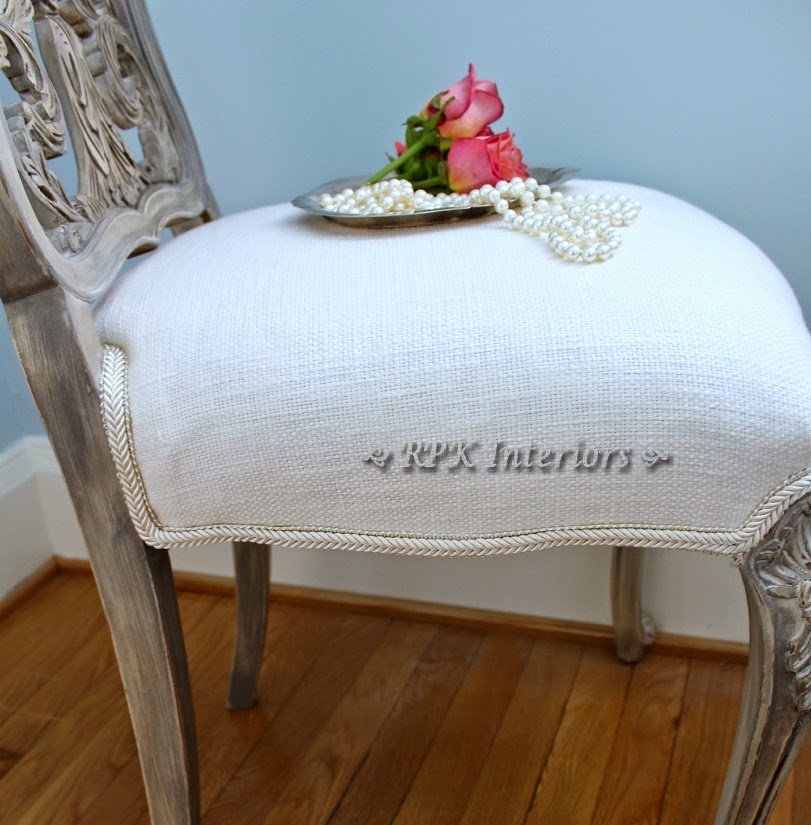
And here she is...all done....
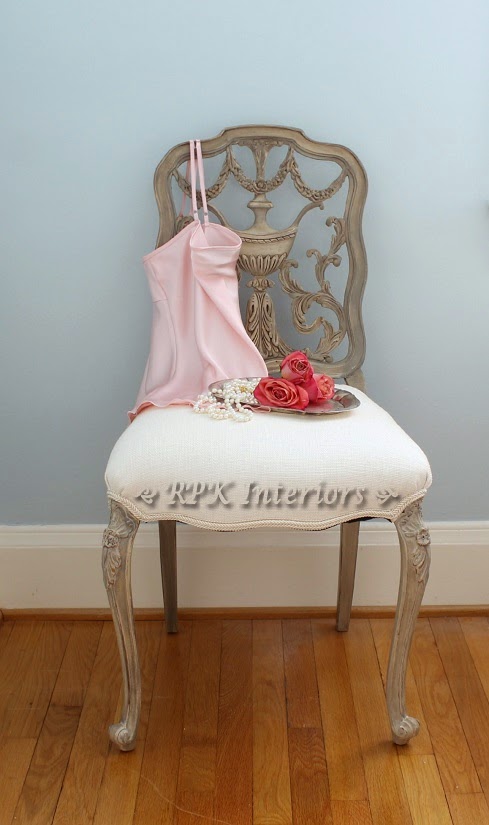


It so happens as I was finishing this up, Marian and Kriste at MissMustardseed were finishing up a wonderful 5 or 6 part video tutorial on reupholstering a French style chair.  If you are contemplating tackling a project like this, I strongly suggest taking a minute to review Rachel's tutorial or Marian's.  They both share very valuable and helpful information.

This is one project where I have an amazing sense of satisfaction and accomplishment!   Thank you, Rachel...You are a dear for sharing so generously your experience and lessons learned!

Thanks for stopping by!

Robin 

Linking up at:


Tuesday, February 10, 2015

The Joy of Mixing Colors!

You probably know by now that unless I am using Old White/Antique White or Pure White/Snow White, I rarely use a color straight out of the can.  For the later part of 2014, I was busy with a lot of soft whites, but 2015 has brought about projects using Coco, French Linen, Paris Gray & Graphite.

My first project was a request from Laurie to paint 2 nights stands in a color that would work well in her master bedroom.  She already has a tall chest painted in a gray, and her walls are a grayish beige. She gave me a paper plate with the two colors painted on it.  I took a piece of molding, stained it, and then started mixing up different shades and combinations of Coco and French Linen.  This is what I offered her choose from:


The paint color on the left is her tall chest and the color on the right is her wall color.  The sample board on the left is French Linen with a Paris Gray wash.  The sample board on the right is a Coco base with a French Linen/Paris Gray mixture to create a wash.  Both samples were sealed and then dark wax was added.

Laurie chose the sample on the right.


My next project was a dresser, chest and night stand for a young man's bedroom.  His mom knew she wanted grays, but narrowing down the right choice of gray can be a bit of a challenge.  As it turned out Leslie Stocker's wonderful Colorways turned out to be a wonderful resource.  Her color palettes are amazing!

We settled on a combination of Paris Gray and Graphite....


The chest had some lovely details that needed to be accentuated with glaze....


Here's the dresser....


And of course, refinished tops...


The theme of gray continued onto my next project.  In this instance, Kim wanted these 3 pieces painted in a Smoky Gray.  After looking through lots of inspiration via Pinterest, she decided on a blend of French Linen and Graphite.

We started with this...


And so far I've completed the dresser and night stand.  


I'll be working on the chest this week and will hopefully get this project completed shortly!  :)

My next project will be my vision....blues/pale greens...Colors of spring!  :)

And as always, I'm studying pieces for inspiration.  I found this in my attic a few weeks ago.  Don't you just love the patina on it?


Thanks for stopping by!

Robin

Thursday, January 8, 2015

Evening Plum by General Finishes

Happy New Year to all of you!  It's been awhile since I've shared a post.  Since much of my work is similar in nature, it doesn't make sense to keep posting the same ole same ole.  But this transformation brought about some good learnings for me, and hopefully you'll find something worthwhile in this post to help you with a future project.

I forgot to get a good 'before' picture...This is the best I have...sorry!


Hopefully you get the idea...1970s blonde oak.  It's a piece from the Hooker Mainline collection for you MCM fans!  :)

My friend, Tamy fell in love with it and wanted a deep pink color.  We looked at a Sherwin Williams paint deck and she picked Dynamo.


I was fully prepared to dip my toe into the world of using Webster's Chalk Paint Powder.  I thought I'd get a sample pot from SW, add the Webster's and be good to go, right?  WRONG!

For starters, the sample paint from SW is awful!  It took me about 10 coats on a paper plate just to get full coverage so Tamy could see the actual color in her home.  I wasn't interested in painting this piece in this bright color, only to have her say, "I don't really like it"!  :)  After running into poor coverage issue, I found upon reading about this, it is a known issue the SW samples are thin.  Okay, I'll just have Benjamin Moore match the color.  Their paints are excellent quality.  I get a quart from BM, closely follow the directions on the Webster's package and start painting.

NOT GONNA HAPPEN!  The paint with the chalk powder was thin...3 coats and I wasn't getting the full coverage I've come to appreciate from ASCP & General Finishes.  Thank heavens Tamy also loved a picture of a piece done in Evening Plum from GF!

Here are the drawers, in my dining room, getting their second coat of Evening Plum:


I love General Finishes paints.  They cover beautifully!  No conversation, no back talk...just very well behaved!

I'm cruising along with the project and realize I need to address the 3 drawers hiding behind the doors.  Hmm....we need to do something special.  White, black and gold.  Tamy zeroed in on a stencil from Royal Design Studios:  African Plumes Furniture Stencil.

Are you ready for some "After" shots?


I cleaned up the hardware and then added some Gold Rub N Buff.


I used a gold pin, Graphite and French Linen by ASCP for the stencil.


Four coats of General Finishes High Performance Gloss Top Coat was the finishing step for this stunning dresser.

My take away from this project:  No Webster's Chalk Paint Powder until I understand better what I did wrong while mixing it or using it.  So if you've had good luck with the powder, please let me know your secret!  :)

On another note, hopefully the quality of my photos will improve in 2015.  The staging and photographing of my pieces is my least favorite part of this process.  But I'm optimistic you'll see some improvements in the coming year!  :)

I hope you found this post helpful or informative!  That's for stopping by!

Robin

Linking up to:

Miss Mustardseed

Wednesday, November 5, 2014

A Little Sparkle with Black is Never a Bad Thing!

Old, tired, cracked and peeling veneer.  What can I say?

 But if you look closely, there are some beautiful carved details on each side and on the top drawer.

After lots of repairs (drawer guide replaced, veneer gluing and wood filling), a soft black was what the doctor ordered.  I used a combination of ASCP Graphite and General Finishes Lamp Black.  You might ask why combine them, RPK?  Well, I didn't want a deep black from the LB, but wanted a darker black than Graphite..So there you have it!


I didn't want the highlighting of the carved detail to be too gold, so I added a bit of my silver wax to the gold wax to make a champagne color of gilding wax.


And here's the sparkle....I love the knobs!


I've found there is always a lot of sanding needed when working with black.


And there it is...a gorgeous Chippendale style chest, reloved and ready for another 50 
years!


Thanks for stopping by!

Robin


Tuesday, October 21, 2014

Vintage Vanity/Desk in Antique White

I've done a lot in Antique White lately....and if you follow along, you know the drill.  Strip the top, shellac the base to keep from having any bleed through issues, and then paint, sand, paint, sand, paint, sand...and then finally paint and sand!  :)  A little light distressing to show off the gorgeous details.  Let the pictures speak for themselves:


The lovely lady who spotted this also inquired about some chairs and stools.  I had this stool in my inventory along with a classic Rose Back Mahogany chair:


Clean, pretty and classic....

Thanks for stopping by...